A Pictorial Guide – Step by step trimming photos of a monthly maintenance barefoot trim by James Welz.
There is no one “right” way to barefoot trim hooves. Nature is the ultimate guideline, and form follows function. In this brief pictorial guide, we will share what we do – what we’ve found that works for us.
There is no one “right” way to trim hooves. Nature is the ultimate guideline, and form follows function. In this brief pictorial guide, we will share what we do – what we’ve found that works for us.
What style or method do we advocate? We didn’t intend to develop something unique. We thought, surely others who were exposed to similar influences would come to these same conclusions. But as it stands, this particular trim, as created by James Welz in the early 2000’s, has unique features as a trimming system. We present this as a successful and duplicatable package. Our focus is upon hoof health: creating and maintaining.
We would love it if people could refer to our style as a generic barefoot trim! We strive for physiologically correct hoof form. We feel that many roads lead to Rome. We have taken the best of what we have learned from every source during our journey these past 2+ decades; however much of our current technique centers around our personal study of wild horse hooves and how their form can be applied to the situations of domestic horses.
Healthy Trimming Basics:
- Heels are trimmed to a natural yet comfortable low heel.
- Bars are trimmed to be straight and tapered.
- As little sole is removed as is possible (“new sole” a.k.a. “live sole” is a guideline)!
- Wall flares are addressed as necessary.
- The outer wall is rolled (Mustang Roll). For hard terrain, entire wall should be rolled, toe to heel. For soft terrain, roll as much as the hoof needs.
- As you become experienced, this trim can transition into focusing on the exact problem at hand (or at hoof!) The hoof is then approached with the concept of “Target Trimming” – trim that which is most important first, and only that – one item at a time. This means that every single part of the hoof is not always trimmed; focus only on what is necessary.
6 Steps for Trimming:
To aid the learning process, we have created 6 systematic steps for barefoot trimming. It is not necessary to go in exact order, but for newbies, this order is very useful for learning.
1) Distal Surface of the Wall
Shortening, as needed, the ground surface of the heels and entire hoof wall.
2) Trimming the Bars
The bars are an extension of the hoof wall horn, and thus if the distal wall is trimmed, the bars usually need trimming, too.
3) Sole Shaping
The sole is trimmed to reflect the complex curve; thus the word “shaping”.
4) Maintaining the Frog
We prefer minimal frog trimming, but it does vary, and sometimes more is needed.
5) Backing Up the Toe
We recommend shortening the toes of overgrown hooves to aid in breakover. Toes are shortened as needed.
6) Rolling the Wall
We recommend rolling the entire dorsal surface of the wall from toe to heel, as needed.
About Trimming by Steps
It’s easy to write down a list of barefoot trimming steps – deceptively easy! What is difficult is conveying the decision process involved. What to remove when, and why. What NOT to remove when, and why! It only takes a few days to learn to trim a hoof. Then it usually takes a few years to learn how to make the complex decisions necessary to trim well!

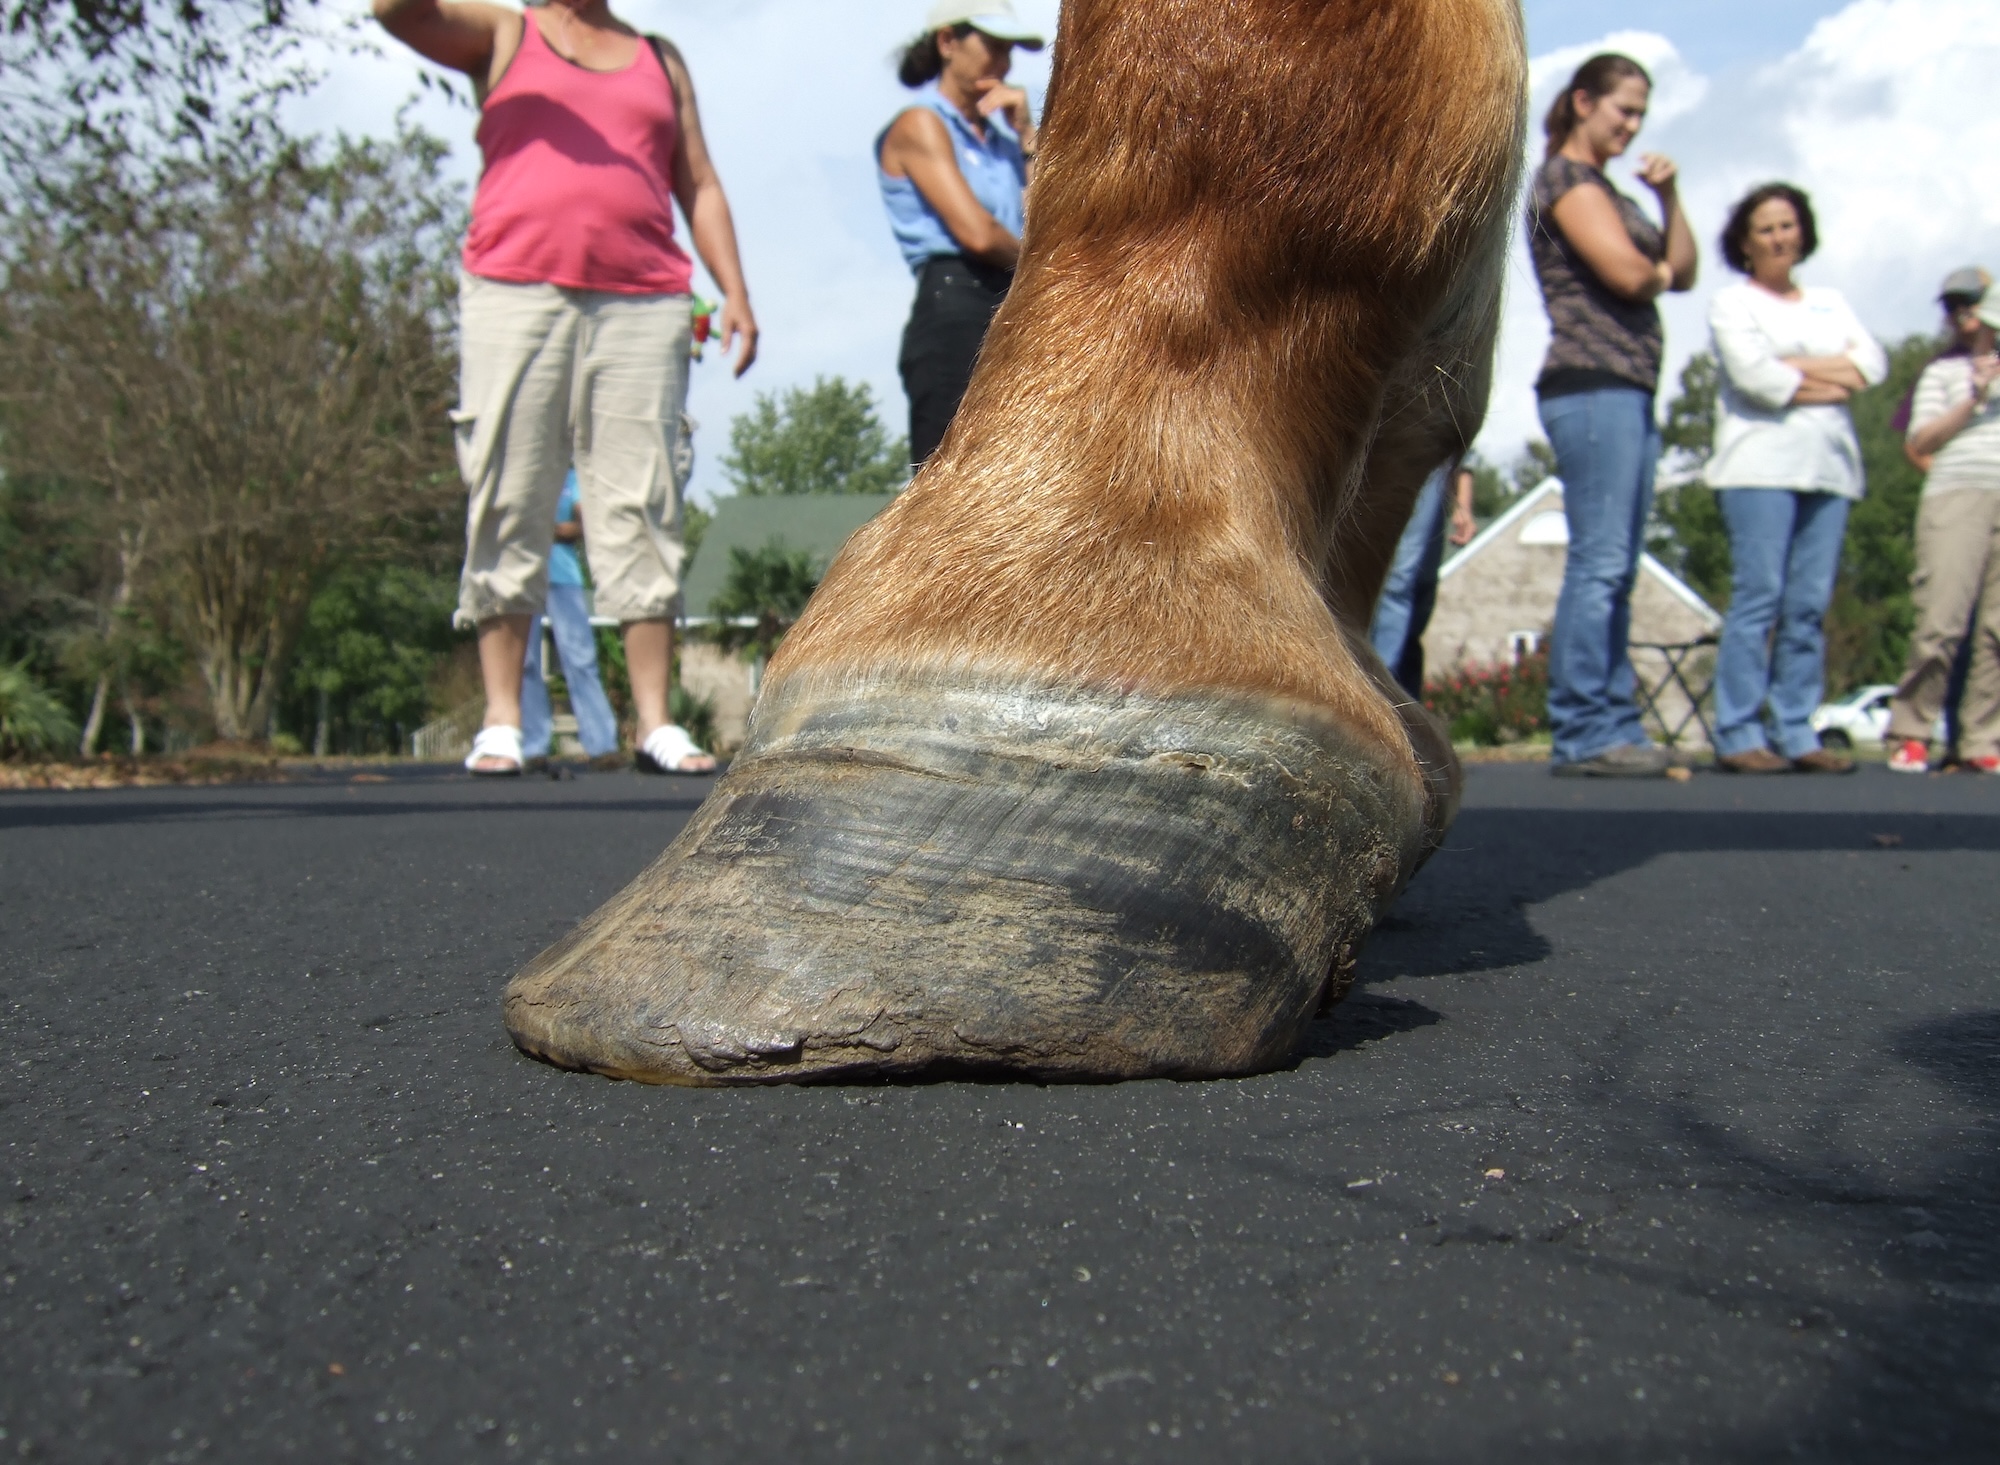
Above: Healthy, sound hoof, before and after a monthly maintenance barefoot trim by James Welz. This is a large warmblood hoof, very wide and uncontracted with low heels. This is an athletic horse in training, living on hard desert terrain, with good living conditions.
What follows are the photos of a monthly maintenance trim on this horse.
First, evaluate the hoof:

Hoof before trimming (one month since previous trim). 3 year old warmblood mare with no health issues. First, evaluate overall hoof health. Locate areas of deviation from normal. In this case, the only problem here is a little excess growth of heel and bar.
1) Distal Surface of the Wall

Begin the trim by rasping down the heels to desired height. We recommend low heels to allow the frog to be weightbearing and in full contact with the ground.
How do you determine correct heel height? There are a few common guidelines. One is to simply bring the heels back to the widest part of the frog. Another simple guideline is to lower heels to the bottom edge of the periople; however this is only helpful if you can actually see the periople, and it hasn’t worn away! Some people use actual measurements, but we think measuring can cause too many problems. Some trimmers will lower the heels by first locating the beginning of the “live sole” or “new sole” in the heel triangle area, and then leaving the heels just a tad bit longer than that — which is a valuable technique, but really needs hands-on guidance and practice. A good hoofcare practitioner develops a natural feel for appropriate heel height for various horses (and every horse is different!). Our recommendation is to be gradual and conservative at first – remember, you can always take more off, but you can’t put it back on!


Then, even out any areas of hoof wall that are flaring or out of balance. The hoof wall is now lightly rounded from the bottom.

Evaluate the hoof balance throughout your trim. Hoof needs to be balanced front to back, and side to side. Uneven hoof wear may need some correction with every trim.
2) Trimming the Bars

Shorten the bars as needed, and trim distinctly separate from the sole.

Careful attention to accurate bar trimming can make a big difference in your horse’s comfort. Note that in our system, the bars are NOT trimmed short in the heels of the hoof. This is for the specific reason of providing greater comfort, and also duplicates the natural wear of wild mustang hooves.
3) Sole Shaping
In a maintenance trim situation, there will be very, very minimal sole removed!
Lightly trim sole only directly around the frog, simply smoothing it over, and removing only dead, flakey sole (this area is called the sole-frog junction). Do not trim into the “live sole” or “new sole,” which has a firm texture. In most cases, do not trim the sole callous in the front of the hoof in any way, and most of the sole should be left untouched. Most horses need their soles left as thick as possible.
Why is any sole removed at all, then? Why not just leave the sole competely untouched? In nature, the horse would take care of this by themselves, through movement and moisture (exfoliation). In captivity, this area of the hoof becomes overgrown (just like the heels do), and when it fills in, it will often cause soreness. We trim this way because it makes horses sounder. Lightly trimming this area should not cause any tenderness – if it does, you have removed too much.

Left side has bars trimmed; right side untrimmed. Photos can often often be misleading; please note that the heels are weightbearing to the back of the frog grooves. This hoof has a very long heel platform (heel buttress) – the area between the rear of weightbearing, and the identifiable bar-wall turnaround point. This horse’s walls are very thick. Only thick-walled horses can have such a large platform. Mustang hooves display this same feature. This mechanically creates a great deal of strength in the heels of the hoof, which is such a benefit to barefoot domestic horses. Those horses with thinner walls will have shorter heel platforms even when trimmed this way, but over time, as their walls thicken, the heel platforms will become correspondingly larger.
The heel-bar area forms this solid platform in the back of the hoof (aka heel buttress). There is a curve to the back of the bar – the bar is fairly straight from mid-point to where it unites with the wall, then there is a natural curvature to the heel platform (this is also a trait seen in many wild horse hooves). The horse bears its weight on the heel platforms and the frog. This horse has an easily observable heel-first landing at all gaits.
The bars should end midpoint down the frog – the reason is that the bar corium also ends midpoint down the frog, so any bar past that area is overgrowth. In nature, the excess bar usually breaks off or flakes away (and if it doesn’t in captivity, the horse needs our help!). Bars are trimmed to be fairly straight, and the bar is trimmed separately from the sole (don’t remove sole while trimming bar, because you may remove too much sole!!) The sole right next to the frog is just barely trimmed to smooth it over, but it is not thinned in any way, nor is it trimmed to dirtline.

Other bar is trimmed. Sole is finished.

4) Maintaining the Frog
Touch up frog only if necessary. In this horse’s case, nothing needed to be removed from the frog. However, if the frog was extremely overgrown, it would probably be trimmed to be passive at the apex to full weightbearing at the heel bulb. We tend to remove very little frog, these days.
On a healthy hoof, the frog usually covers about 2/3 of the length of the sole of the hoof. It should appear full and robust.


Here is an example of the importance of photo angle – keep this in mind when you look at photographs. Same hoof as above, same day, only difference was the position of my camera!
5) Backing Up the Toe

Using your rasp, reduce the length of the toe from the front only. Never try to reduce the toe length by thinning the moon-sickle area (from the solar side). This horse needed almost no backing up of the toes, which is ideal.
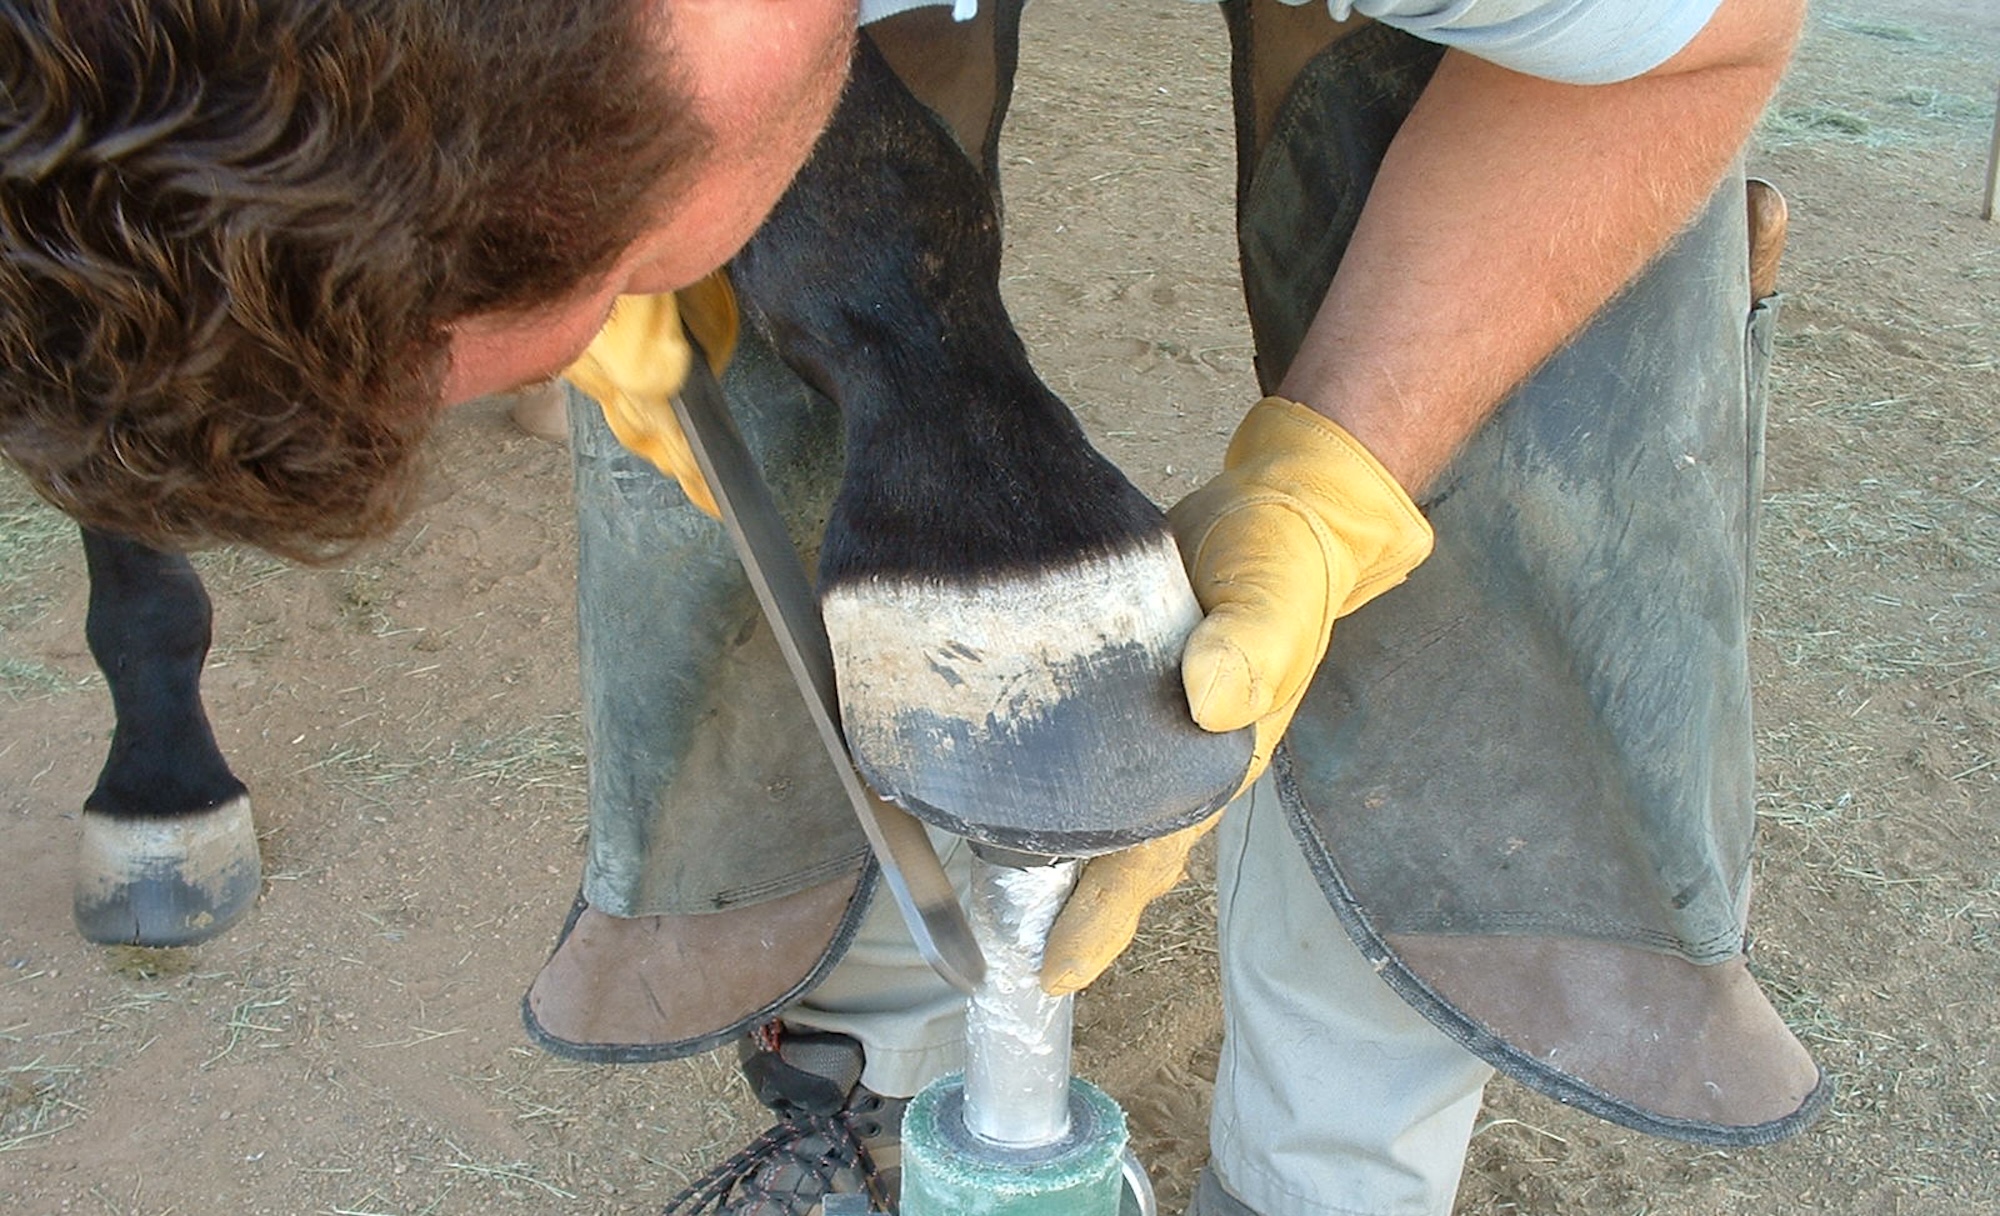
6) Rolling the Wall

Finish up with a mustang roll, which creates a natural scooping of the quarters.


James describes his mustang roll technique as beveling the hoof, then beveling the bevel, then beveling the bevel again – repeat until edge is smooth and round. It is really okay to just bevel once and leave at that – but a well-rounded bevel (a bevel that is beveled a couple more times!) will last longer! This bevel is concentrated only on the bottom wall edge, not higher up the hoof wall. When the beveled bevel is finished, it will duplicate the mustang’s naturally rolled walls. And like the mustang, we prefer that the roll is through the entire wall, heel to toe.


If the roll is applied correctly heel to toe, the quarters will become passive because the hoof just naturally calls for this. Done this way, scooping of the quarters removes no sole at all. It is also not intentionally created, but an end result of the natural form of the healthy hoof.

The finished product. Even a warmblood foot looks sort of like a mustang’s.

Overall balance from the top. You want to see a nice symmetrical form.

Before and after, one last time. Note how everything flows and appears harmonious and balanced.
This horse was completely sound on rocks immediately after the barefoot trim. For healthy horses, this is a very important factor in determining whether your techniques are working well for you, or not. A second important factor is hoof form over time: keep accurate records and photos of your horse’s hooves. Hoof form should stay consistent or improve over time. If hoof form deteriorates, you need to re-evaluate hoof care, trimming techniques, and living conditions.
Keep in mind, this is just a single trim, and each horse – and, well, each single individual hoof – is trimmed uniquely. Also, every barefoot trim is different, each and every time! And every hoof is always a work in progress!
Happy trimming!
by James and Yvonne Welz, published 2023 Hoof Help Online
See the full content listing of all issues of The Horse’s Hoof Magazine! We also provide instructions on how to read the issues for free on Hoof Help Online.
For a detailed listing of all articles on The Horse’s Hoof website, please visit our Article Directory.